I love security and love to keep my systems security. I have been using capabilities such as SPF and DKIM records and more recently DMARC records and ensuring I have quality SSL setup on my web server and testing using https://www.ssllabs.com/ssltest/ and ensuring I have quality headers too and test using https://securityheaders.com/.
Now that Route 53 supports DNSSEC (https://datatracker.ietf.org/doc/html/rfc4033) I figured it was about time I enabled it.
You can find some information about DNSSEC and enabling on your domain by following the AWS blog post: https://aws.amazon.com/blogs/networking-and-content-delivery/configuring-dnssec-signing-and-validation-with-amazon-route-53/.
Here is how I did it for my domain (the one you are reading this on).
First go to the route 53 console and click on DNSSEC signing in your domain details page:
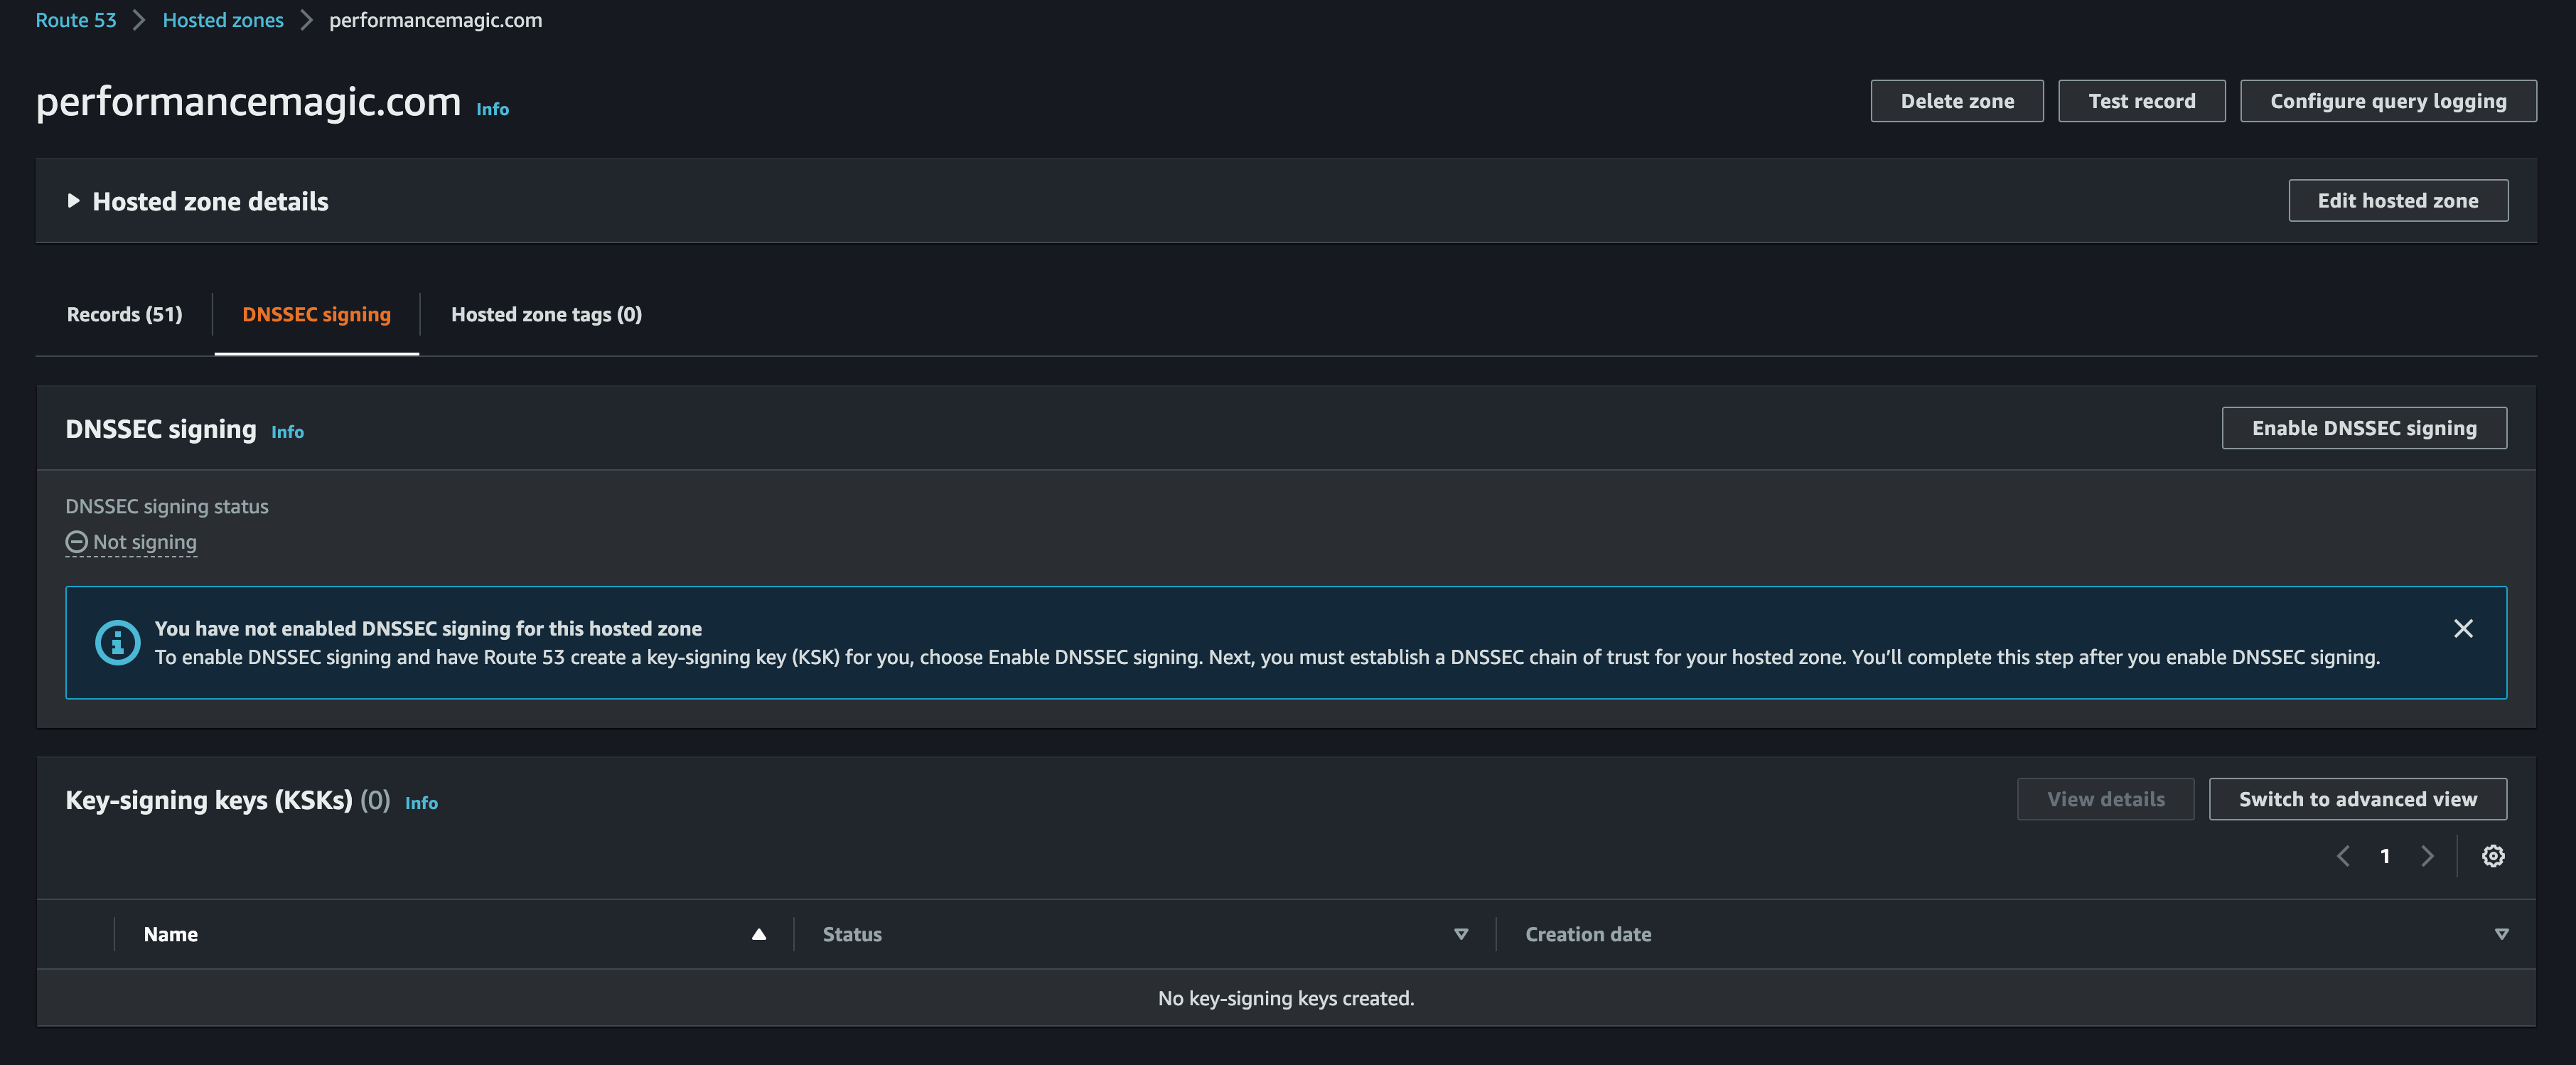
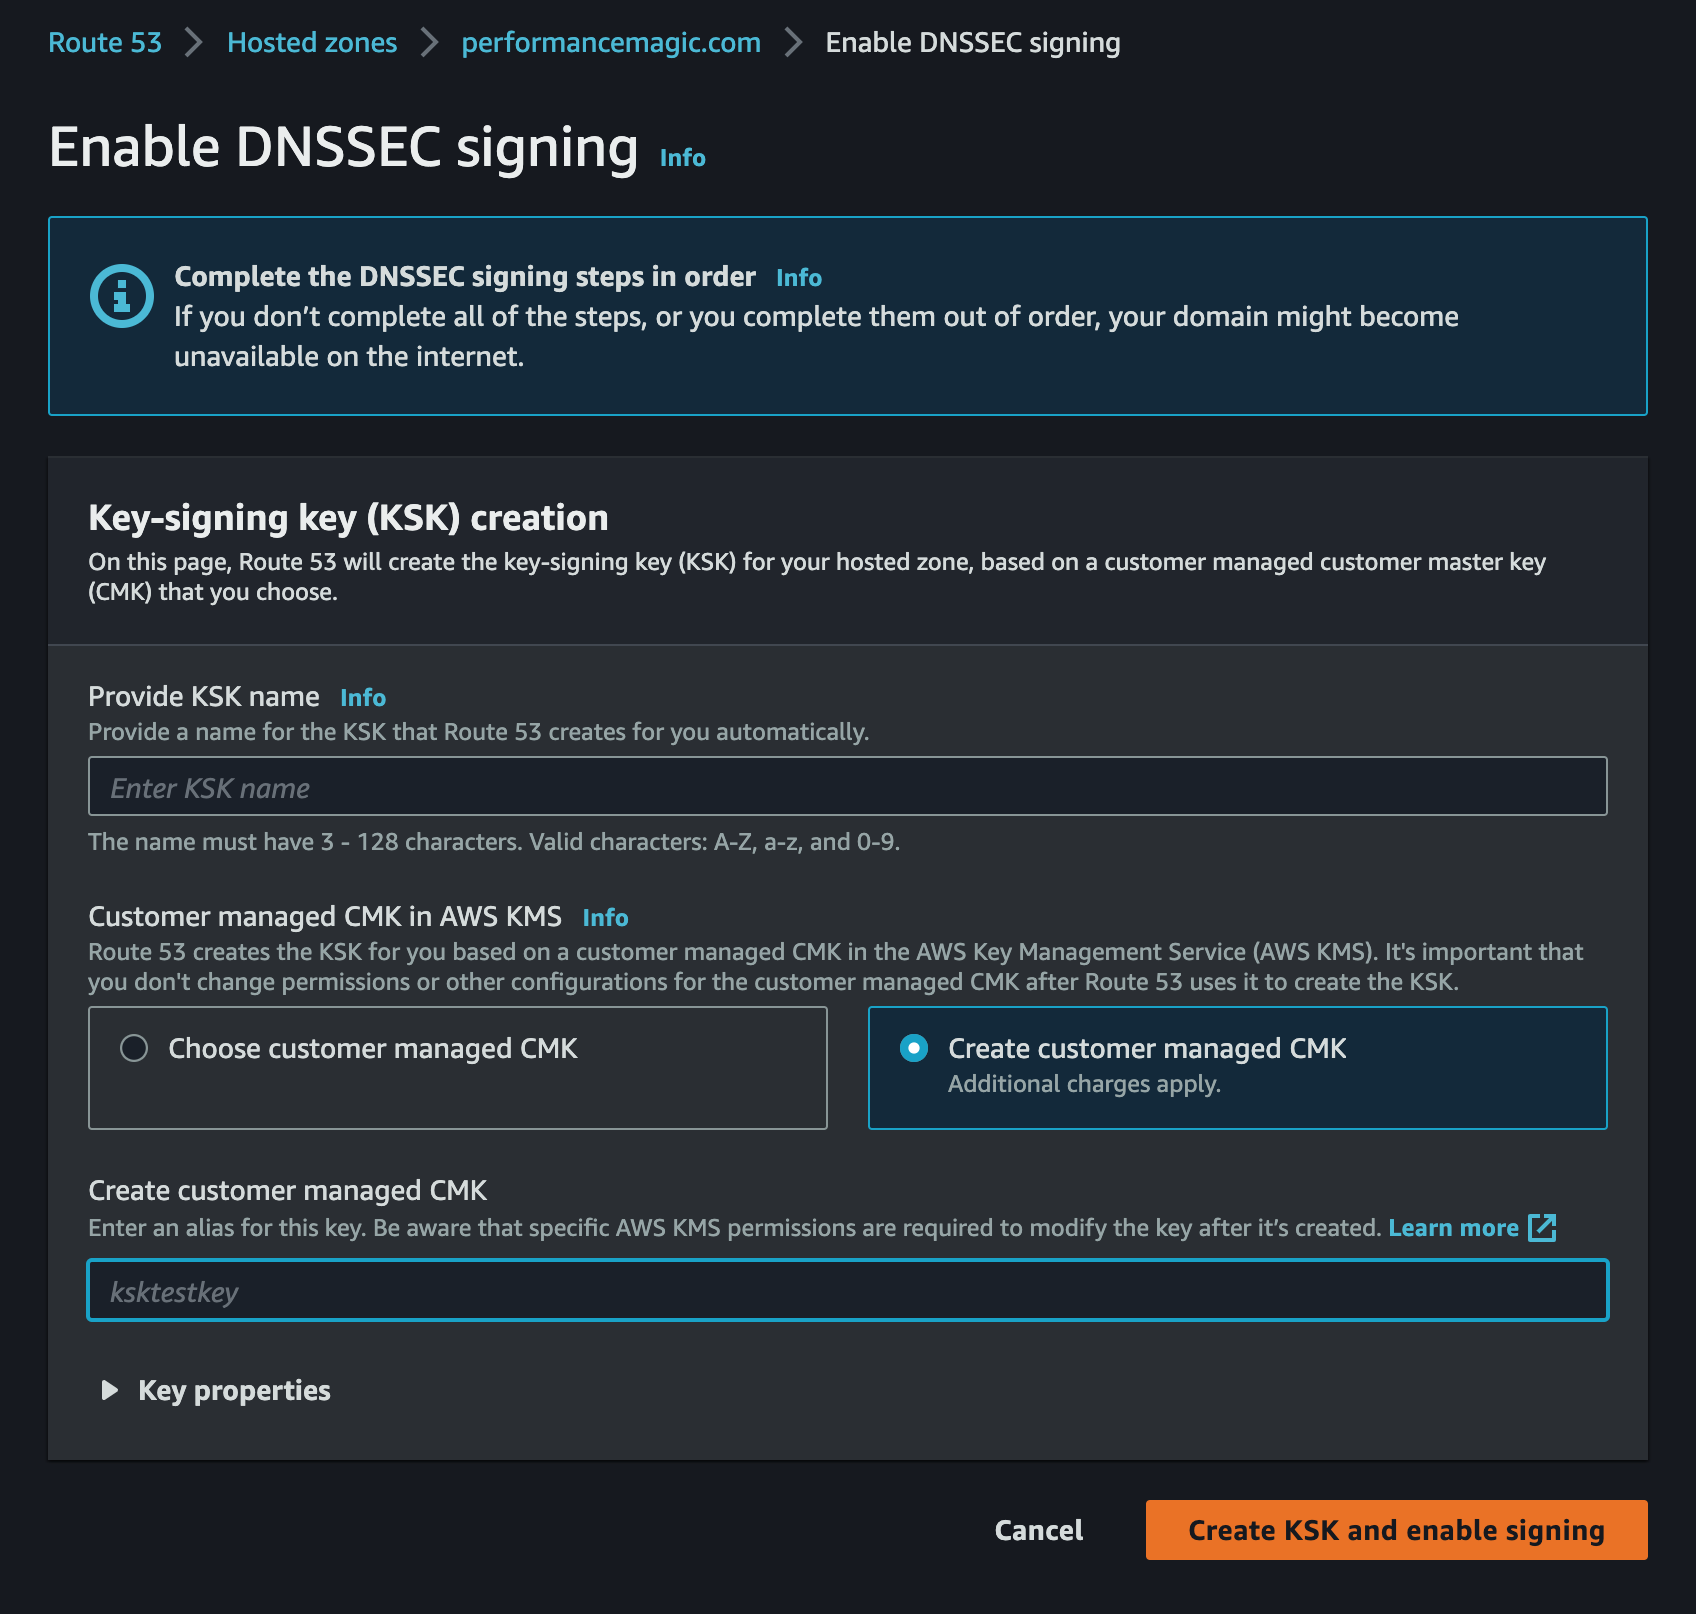
Here you can create your key signing keys using a KMS CMK. You can either use an existing key or create a new one.
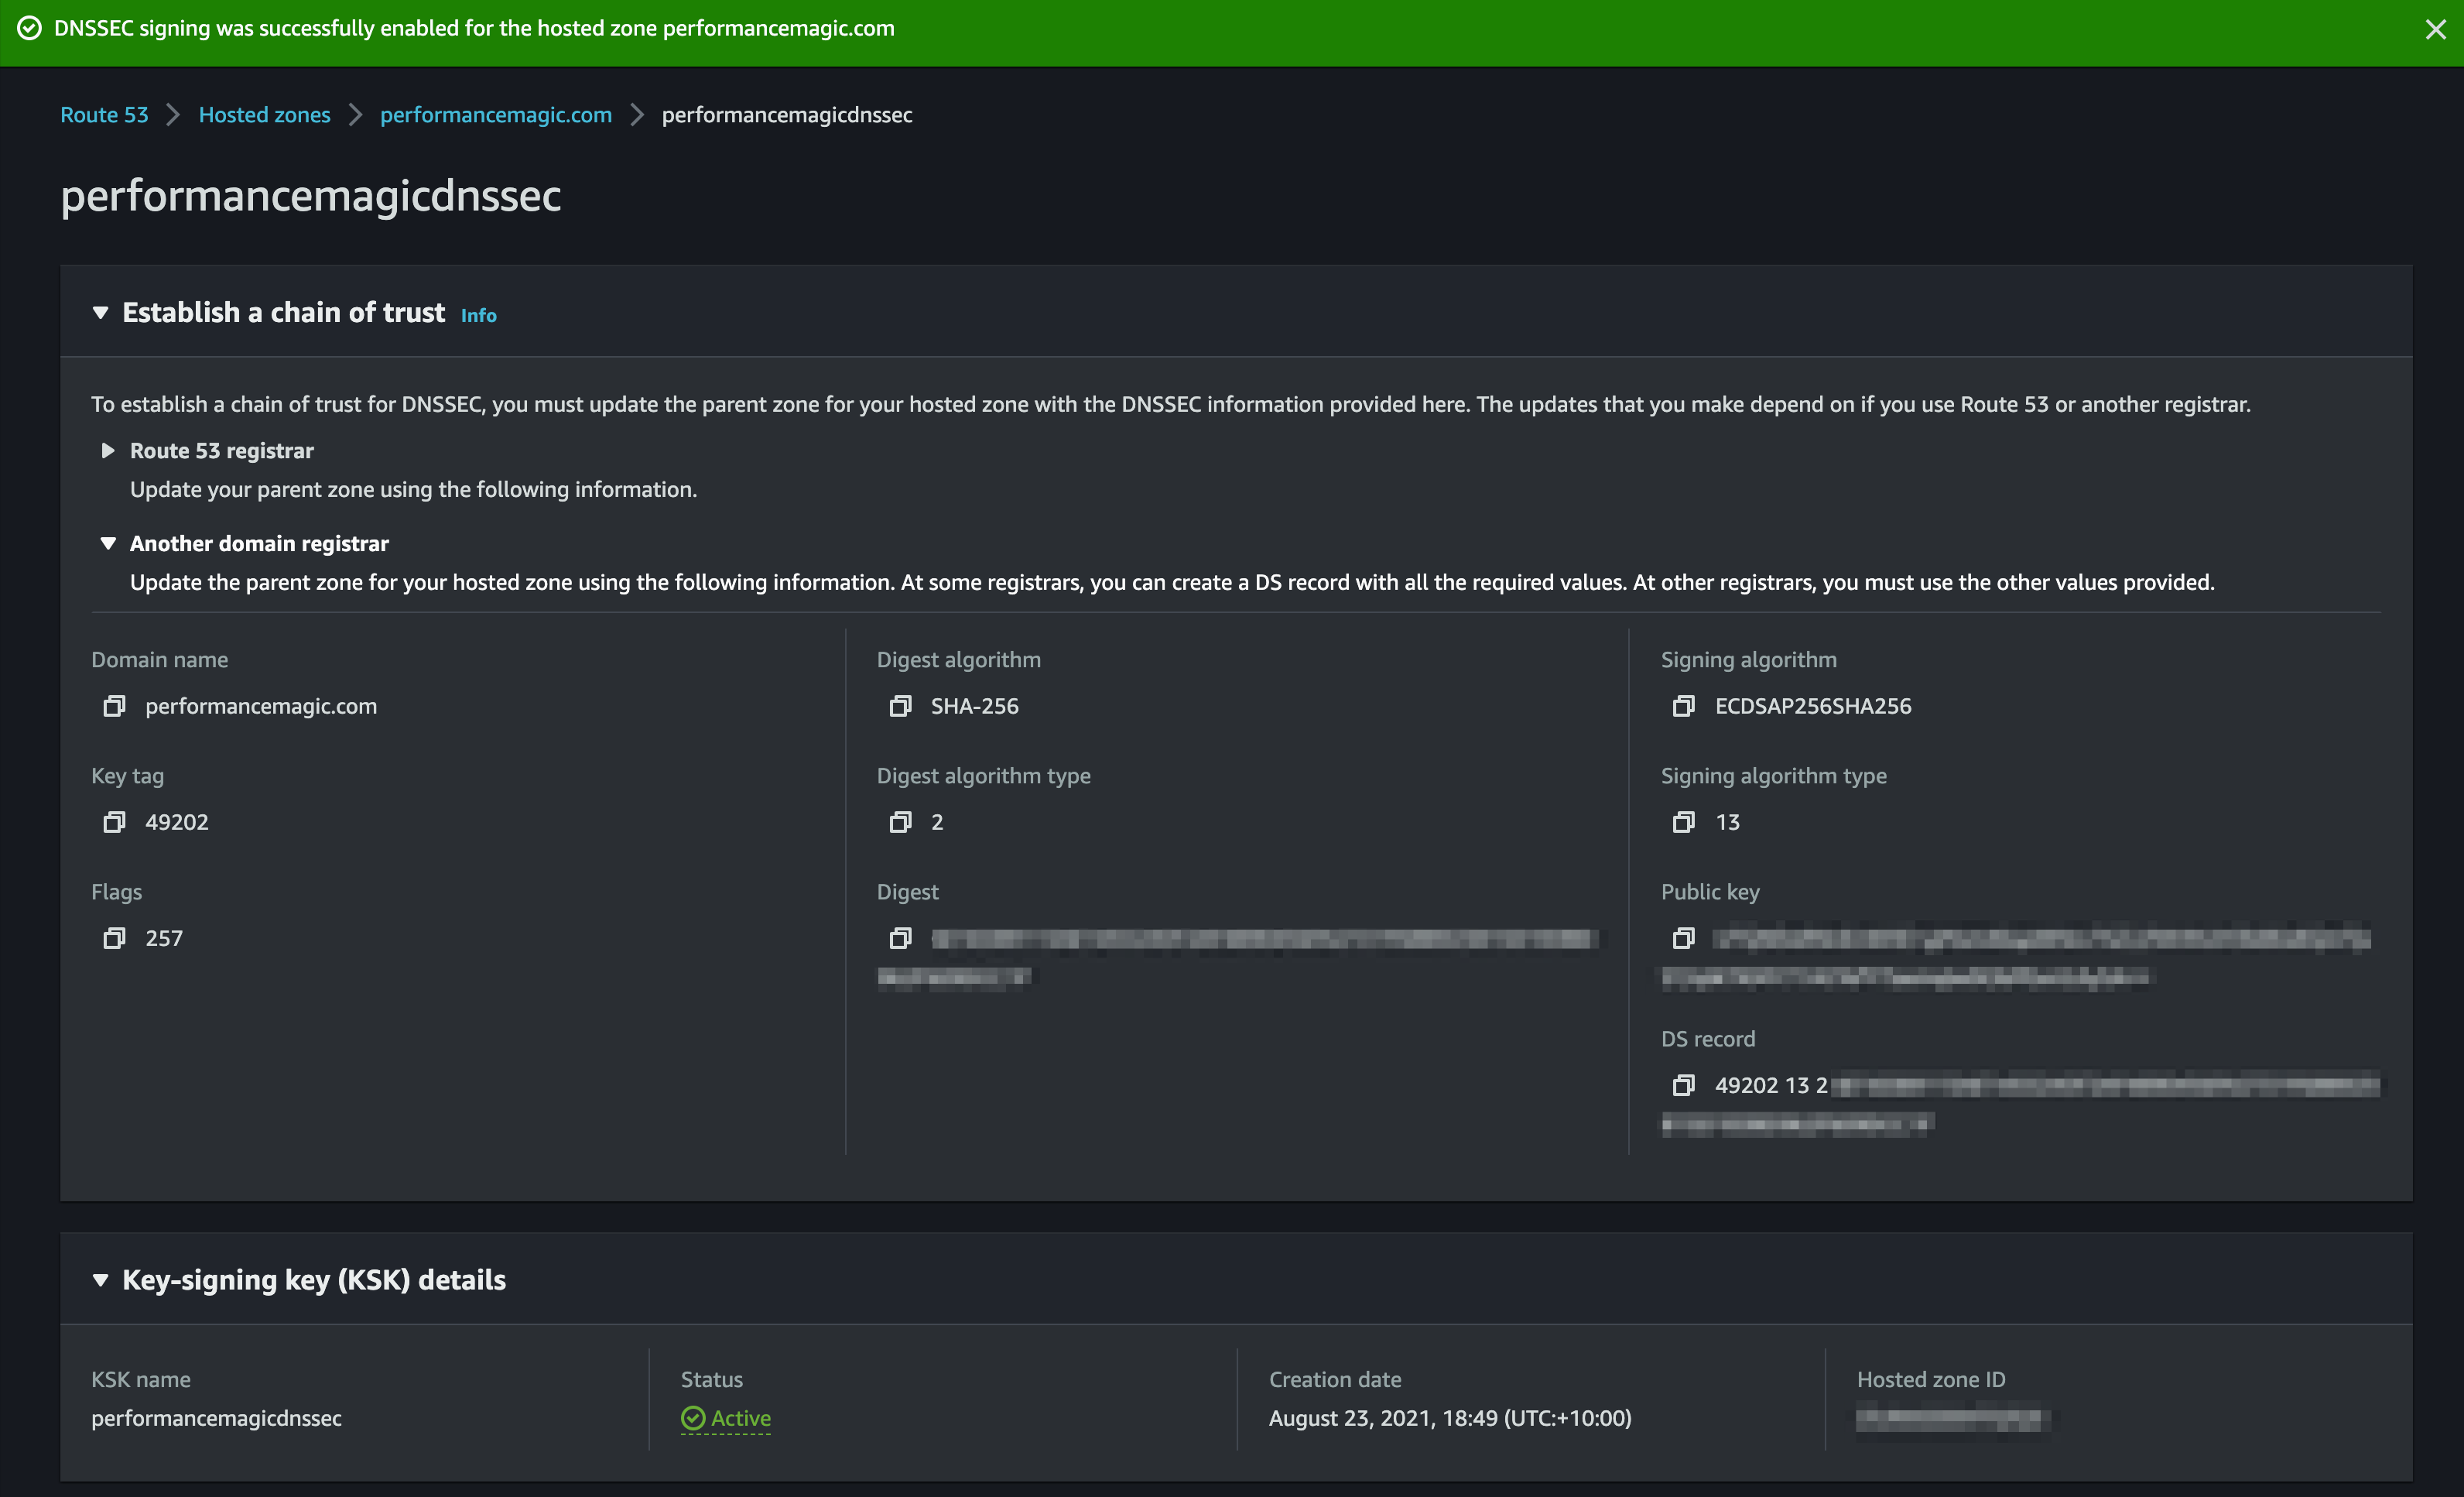
Once the keys are created you need to get the DS records:

Now update your registrar with the DS record information:
My domain is registered in Route 53, so it’s a simple case of going to my domain in the registrar and clicking on Manage keys next to the DNSSEC status.

Copy the key type, algorithm and public key from the DS record information:
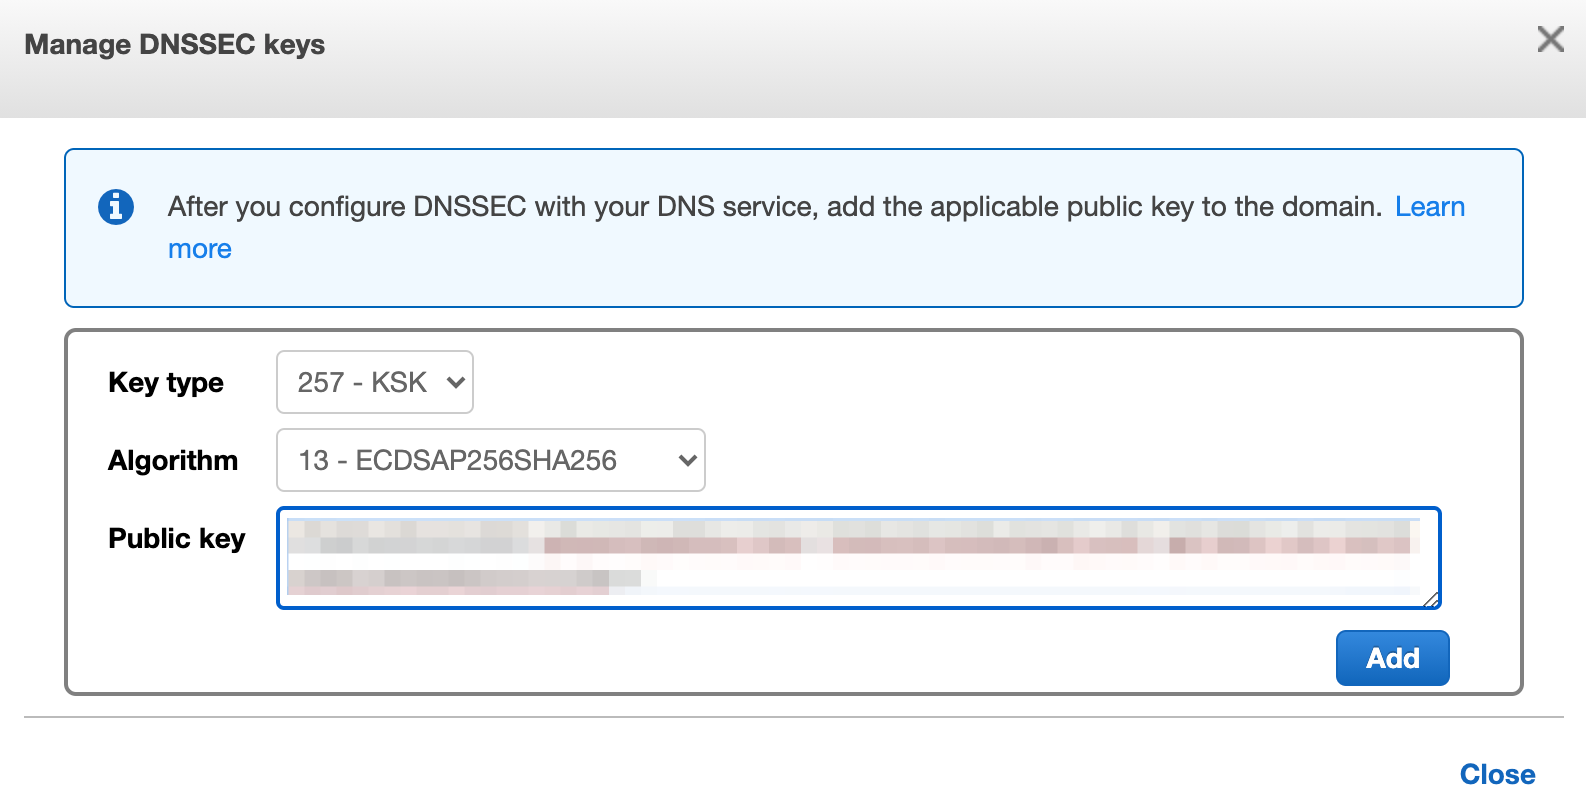
Then click save:

Now got and test:
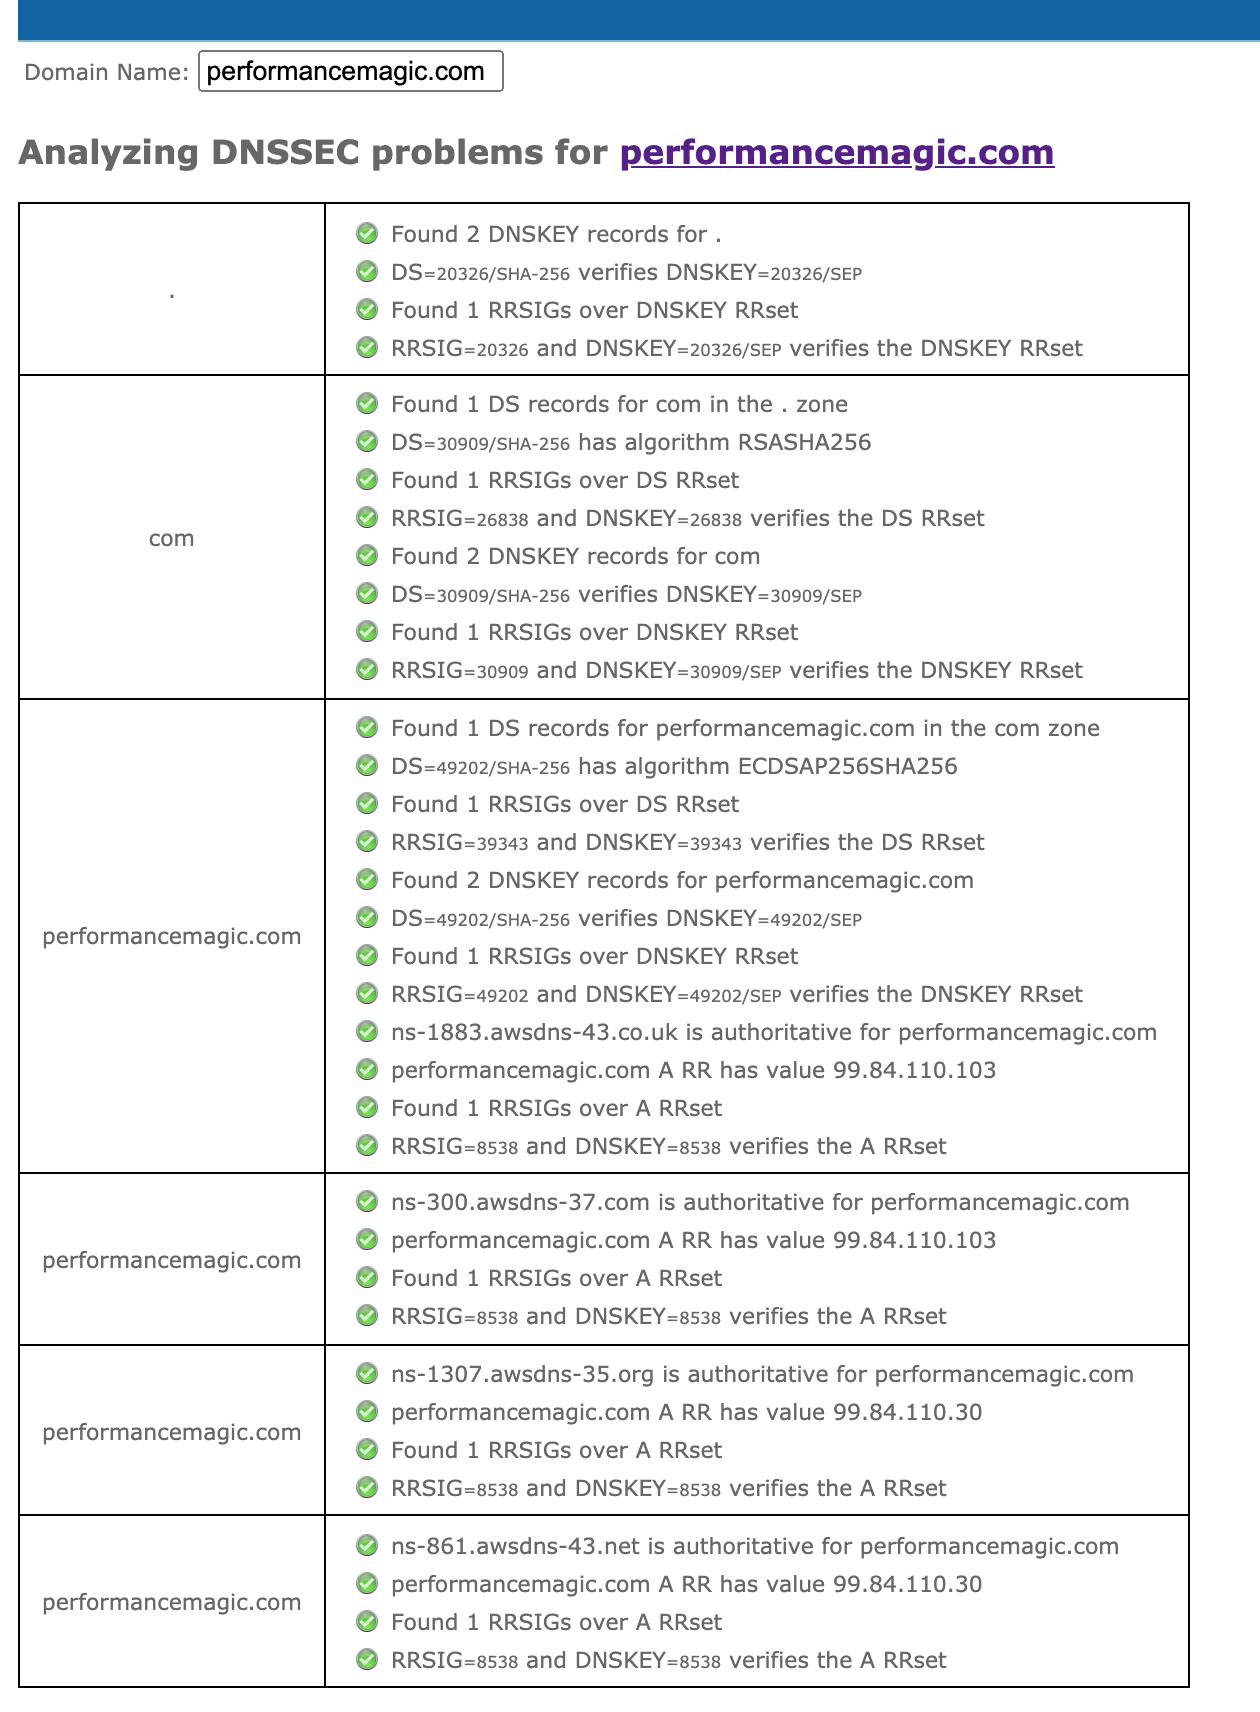
https://dnssec-analyzer.verisignlabs.com/performancemagic.com
Of course the devil is in the detail, and make sure you understand the consequences before enabling DNSSEC. But hopefully I’ve shown you how easy it is to enabled DNSSEC in Route 53.